Tuesday, December 13, 2016

Get the Powerful iPhone Transfer Tool for Free As Your Christmas Gift


Christmas is around the corner.  As the most important festival for the whole year, you may have many plans to celebrate it. Of course, listening/singing Christmas music or watching Christmas movies are always traditional activities for us. Staying with our families or friends to enjoy music/movies is quite happy, especially for busy office workers.

Undoubtedly, you could purchase the Christmas music/movie in the internet. But what if you have some non-purchased Christmas music/videos and you want to transfer them to your computer or iPhone/iPad for offline enjoyment? The third-party iPhone transfer software can solve the problem for you.

The program is called Leawo iTransfer. According to its developer Leawo, it allows users to quickly and securely transfer data between iOS devices (iPad, iPhone, and iPod), iTunes and PCs.  All popular files, like apps, music, videos, photos, contacts, etc. are included. For example, you can easily use the tool to transfer videos from PC to iPhone/iPad/iPod without iTunes.

Now, you could get the iPhone/iPad/iPod for totally free. Leawo Software gives out the software as free Christmas gift for all participants. The first period of the 2016 Leawo Christmas Giveaway and Special Offers activity lasts from Dec. 13th to Dec. 22th. During this period, Leawo iTransfer is available for totally free for all worldwide participants, both Mac and Windows versions.

You only need to register with name and personal email address, and then choose which version (Mac or Windows) to get the helpful iPhone transfer software. The company would then send a code of Leawo iTransfer to registered email address for free.

In addition to free giveaway, Leawo Software provide big discounts for other products. Leawo TunesCopy, the newest iTunes DRM removal program released by Leawo Software, is now available at the price of $9.95 with 75% off. Leawo Tunes Cleaner is also provided with 50% discount. Other Leawo best-selling Blu-ray/DVD/video/Apple products, like Prof. Media, Video Downloader, iOS Data Recovery, Blu-ray Ripper, all enjoy up to 70% discounts.


For more details about the Christmas promotion, you could visit here: http://www.leawo.org/promotion/special-offer/


Monday, December 12, 2016

How to Remove iCloud Account from iPhone/iPad


Before removing iCloud account from iPhone/iPad, you need to keep in mind that the removel of iCloud account can cause a variety of complications and errors, ranging from improper or missing iMessage delivery, loss of data syncing, inability to retrieve apps that are associated with an Apple ID and App Store account, the removal of expected iCloud backups, and even loss of files and iCloud data. Therefore, you'd better backup your iPhone with iTunes before removing iCloud account from iPhone/iPad.

Method 1. Remove iCloud Account from iPhone/iPad Directly


Step 1. Open the Settings app and go to “iCloud”. Then scroll down under all the settings to find “Delete Account” (or “Sign Out”) and tap on that. Confirm the removal of the iCloud account from the device by tapping on “Delete” or “Sign Out”.

Step 2.  Two options are available: “Keep on My iPhone” and “Delete from My iPhone”. If you wish to keep those data on your iPhone, tap on “Keep on My iPhone”. If not, tap on “Delete from My iPhone”. Note that this will only delete data from your iPhone and not the iCloud account.

Step 3. Sometimes, it requires iCloud password. And if you’ve forgotten the passcode or you have no password, the iCloud account can’t be removed.

Method 2. Remove iCloud Account from iPhone without Password


In case that you forget your iCloud password but you still want to remove iCloud account from iPhone/iPad. You can follow the steps below to finish the task with ease.

Step 1. Open the Settings app and go to “iCloud”. Then  tap on it to open. When prompted for a password, enter any random number. Then Tap on “Done”.

Step 2. iCloud will tell you that the username and password you entered is incorrect. Click on “OK” and then “Cancel” to go back to main iCloud page. After that, tap on Account again but this time, remove the description and then tap on “Done”.

Step 3. You will be taken back to the main iCloud page without having to enter your password. You will also notice that the “Find my Phone” feature has been turned off automatically. Then scroll down and tap on Delete. You will be promoted to confirm the deletion which you can do by tapping on “Delete” again.

After removing iCloud account from iPhone/iPad, you can switch to a different iCloud account. Enter the new or different iCloud Account credentials and log in as usual by tapping “Sign In”. Then you can choose the iCloud settings to use with the new account ID.

Related Tip: If you have no idea about how to backup iPhone/iPad, you could go to Apple official site or visit the tutorial: How to Backup iPhone?

Wednesday, October 26, 2016

iTunes Can't Recognize iPhone in Windows 10? Fixed


If you recently upgraded your computer to Windows 10, you might meet the “iTunes not recognizing iPhone in Windows 10″ issue . No worries. In this post we are going to tell you how to fix iTunes not recognizing iPhone in Windows 10 computers. 
Now, the following solution may help you fix the iTunes issue if you found that your iTunes does not recognize iPhone in Windows 10 computer.
Step 1. Connect your iPhone to computer and wait for some time until the device is recognized.
Step 2. Right-click “Computer”, Go to “Device Manager”. Then expand category “Universal Serial Bus controllers” and locate “Apple Mobile Device USB Driver”.

Step 3. Right-click “Apple Mobile Device USB Driver” and click “Update Driver Software”. On the pop-out window, choose “Browse my computer for driver software”.

Step 4. Then choose “Let me pick from a list of device drivers on my computer”.

Step 5. Click “Have Disk…” button.

Step 6. Click “Browse”.
Step 7. Navigate to “C:\Program Files\Common Files\Apple\Mobile Device Support\Drivers”. Then double-click the usbaapl file. If you have a 64-bit version of Windows, this file will be called usbaapl64.

If you don’t see usbaapl64 here or if there isn’t a Drivers folder, look in “C:\Program Files (x86)\Common Files\Apple\Mobile Device Support\Drivers”.
Then you need to install the driver for your Windows 10. After installing, unplug your iPhone, then reconnect it using USB cable. Open your iTunes and see if your iPhone can be detected or recognized by iTunes.
Note:
  • Make sure that you have the button Trust this computer on your iPhone when connecting to your PC.
  • Make sure that you have installed all Windows updates. This is to make sure that your computer device drivers are up to date.
  • Make sure your iPhone USB cable works well.
  • Make sure your iOS device is turned on.
  • Make sure you have the latest version of iTunes installed.

Tuesday, October 11, 2016

How to Fix iPhone Camera Not Working


"I don't know why my camera is not working, I am sure it is a software problem, it just shows a black page. All features are working but it doesn't show an image. It is not working on other apps, like Instagram, as well. The front camera is not working. I have tried to "Reset All Aetting" option but it is not working neither. I upload a photo which is the screenshot when I run camera How can I solve this problem?"

Taking beautiful photos with iPhone Camera is easy for us. But many people reported that their iPhone camera not working issue. Therefore, how to fix it? In this article, we will focus on showing you how to fix it when you find that your iPhone camera won't work?

1. Force the Camera App to Close

This is the easiest but useful way to fix iPhone camera not working issue. To force the camera app to close, tap on the Home button two times, and you’ll get the preview of the apps you have been used. What you need to do is to find the Camera app, and swipe up to close it. Go back to the Home screen, and launch the Camera app again.

2. Try The Third-party Camera App

There are many third party camera apps for iPhone that you can find in the App Store, such as VSCO, FoToRus, etc. After you download and install one of them on your iPhone, try to take some photos with it. If this app works fine, try again to use the iPhone default camera app. If it doesn't well, you may need to find other ways.

3. Restart Your iPhone

You can also restart your iPhone, and then launch the Camera app again. To turn off your phone, press and hold the sleep/wake button, then drag the slider to power off. Usually, when you do this, which is basically a restart, you turn it back on right away. Wait for a while, and then turn it back on.


4. Toggle Low Power Mode on or off. 

Some iPhone users have successfully dealt with camera problems by simply toggling the Low Power Mode feature on their device. After you toggle this feature on or off, reboot your iPhone and then open the Camera app. You can give it a try this time and see if it too does wonder to you as well.

5. Update IOS

The software bug could cause your iPhone camera is not working. To get rid this problem, updating the iOS to the latest version seems to be a great idea. You can check if there is an iOS update, go to "Settings > General > Software Updates". If there is a new Software update available, iPhone will download the update first. Once it’s done tap Install. When the update complete installation of itself, the device will automatically reboot and boot back up as normal when finished.

6. Reset All Settings

Reseting all settings on your iPhone may help you solving this issue. Launch Settings and select General. In General window, scroll down until you find "Reset", and tap on it. In the next window, choose "Reset All Settings". You will need to enter your passcode. Once it’s done, hit "Reset All Settings" in the popup window to confirm the action.

7. Erase All Content And Settings

This is effective, but should be taken as a last resort. You should back up the files on your device to iCloud or PC backup. Because this method will erase all your content and settings on your iPhone. You just need to go to "Settings > General > Reset" and then choose "Reset All Contents and Settings", then you will get all the files in your iPhone erase.

If you still can't solve the problem, you can also take it into an Apple Store and show the iPhone camera not working issue to them. If you're still under warranty, then you should get a replacement without any hassle.


Wednesday, September 28, 2016

Two Ways to Bypass iCloud Activation Lock on iPhone

If you find a lost iOS device and want to return it to the owner, you may need contact number of e-mail id of the owner. However, you cannot access these if the iPhone is locked. In the situation, you need to bypass iCloud activation lock on the iPhone.

1. Bypass iCloud Activation Lock Quickly

Step 1. Press the home button and tap on Wi-Fi Settings; now tap on “i” next to Wi-Fi symbol.
Step 2. From here, you need to follow below mentioned steps after removing the existing DNS.
  • If you are in USA/North America, type in 104.154.51.7
  • If you are in Europe, type in 104.155.28.90
  • If are in Asia, type in 104.155.220.58
  • In rest of the world, type in 78.109.17.60
(In this situation, there is a way to help the owner get his phone back. Bypass iCloud Lock in iOS 9 or iOS 8 for iPhone. This method works from iOS 9.2 to iOS 8.)
Step 3. After you have entered the right DNS, tap the “Back” button and click “Activation Help”.

When you have successfully completed the steps mentioned above, you will receive a message saying that “You have successfully connected to my Server”, which means that your device is activated and you now are able to most of the major functions of the device, including the settings. By tapping on Menu on the top right, you can access different functions like iCloud Locked User Chat, Social, Internet, Mail, Maps, YouTube, Video, Audio, Games and more.

2. Bypass iCloud Activation Lock Permanently

Further, if you want to bypass iCloud activation lock permanently, follow the steps below.
Step 1. Tap on the Menu, then go down to Applications and tap on it.
Step 2. Now tap on Crash. With this action, your iPhone will reboot.
Step 3. When the iOS device restart, choose “Language and Country”, press the “Home” button and tap on “More Wifi Settings”.
Step 4. Tap on “i.” and scroll down and tap on Menu under HTTP PROXY.
Step 5. Clear the address bar and tap on the Globe on the keyboard.
Step 6. Type in 15 to 30 characters randomly and type in “8888” in front of Port and tap on Back.
Step 7. Now again tap on Next.
Finally, keep sliding to unlock and click the language options for 2-3 minutes without giving your fingers any rest. This action will lead you to the home screen of iPhone.
Now, you can access 3 applications – Phone, Newsstand, and FaceTime. But every time you open one of the apps, you need to restart the iPhone.
If you need help to know how to bypass iCloud lock, there are also many paid unlocking services available online. You can choose the one that you trust and start to unlock the iCloud lock.

Saturday, September 17, 2016

iPhone 7 vs iPhone 6s, Should You Upgrade?

As we all know, iPhone 7 and iPhone 7 Plus are now available to purchase in Apple official website or Apple Store or other agency shops. As the biggest hit on this September in the smartphone market, the new iPhone 7 has some new features and redesigns comparing to old iPhone 6s. The new handset isn't a huge leap over the previous model, but there are still a few things here to get excited about. So, if you're the owner of an iPhone 6s or iPhone 6s Plus, should you upgrade? Let's take a look at the major similarities and differences between iPhone 7 and iPhone 6s to help you decide.

1. Design

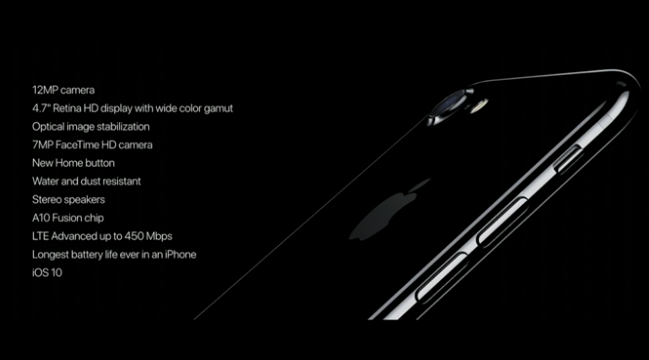
The height, width and thickness is the same for iPhone 7 and iPhone 6s and the predecessors of iPhone 7 are actually a tad lighter than iPhone 6s. Design wise, the biggest change is that the new iPhone 7 is finally water and dust resistant. Apple says the iPhone 7 models get an IP67 rating, which means they can survive being submerged up to 1 meter underwater for as long as 30 minutes. The home button is different, too. Home button now features a new version of the pressure-sensitive and Touch ID sensor. It no longer actually clicks, but simulates one via a vibration like the Force Touch trackpad on MacBooks. The Force Touch Home button offers Taptic feedback and this can be programmed via third-party applications to offer “new feelings and experiences” for users.

2. Screen

The screen sizes remain the same—iPhone 7 will have a 4.7-inch display and iPhone 7 Plus will have a 5.5-inch display—nestled in the same fashion, with a noticeable bezel surrounding them. The resolutions also remain the same: 1,334 x 750 pixels on the small one, 1,920 x 1,080 pixels on the large one.
The new phones have upgraded displays that are 25 percent brighter, with a wider color gamut for better color reproduction and improved color management. Both include the 3D Touch pressure sensitive display that debuted with the 6S line. But it appears that Apple did not update the image resolution of the displays, meaning that this year’s iPhone has the same number of pixels as 2014’s iPhone 6. (The iPhone 7 is 750 x 1334 pixels, while the iPhone 7 Plus is 1080 x 1920.)

3. Camera

The camera is where things get interesting and perhaps the hardest to quantify. On paper, the raw megapixel count hasn't really changed. The iPhone 7 and iPhone 6s have 12-megapixel sensors on the back, but where the real difference comes is with aperture, pixel size, and post-processing. The 7 has f/1.8 aperture compared with the 6s's f/2.2, giving it a bigger pixel size, optical image stabilization, and longer exposure. Most importantly, it has new image signal processor that uses machine learning to process pictures, and take the best shots with tone mapping, noise reduction, and a wide color gamut.
That means the iPhone 7 should take better, more reliable shots in all circumstances, but especially in low-light settings. It should also do a better job of reducing noise and getting rid of blur from shaking hands.

4. Headphone

Apple finally ditched headphone jack, which means you’ll have to rely on a Lightning converter for your current headphones, or upgrade to a pair of Bluetooth earbuds. To make up for the missing headphone jack, Apple is including a pair of Lightning-connected (wired) EarPods in the box and a Lightning-converter for your 3.5mm headphone plug. These new EarPods and a dongle for connecting older headphones to the iPhone 7 will be included along with the new iPhone.
The lack of a headphone jack also prompted Apple to improve wireless audio — the result is the W1 wireless chip. It’s implemented in another new Apple product, the AirPods, which are completely wireless and get 5 hours of battery life. They aren’t included in the box, and you need to purchase it at $159.

5. Processing and Graphics

The iPhone 7 and 7 Plus utilize Apple’s most powerful processor ever: the A10 Fusion. It’s a 64-bit quad-core processor that’s 40 percent faster than the A9 in the iPhone 6S and 6S Plus. Apple says it’s 120 times faster than the original iPhone. The processor also improves the iPhone 7 and 7 Plus’ graphics — it’s 50 percent faster than the A9. The 7 also comes with 2GB of RAM, whereas the 7 Plus offers 3GB.

6. Battery Life

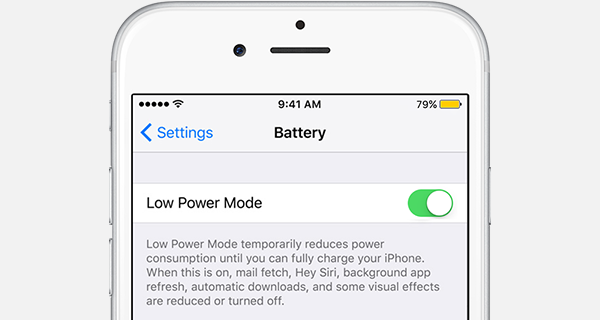
Apple also says that the new phones have “the longest battery life ever of an iPhone”, but the actual improvements seem as incremental as always. The company says the smaller iPhone 7 will last two hours longer than the iPhone 6S, while the 7 Plus gains an hour over the 6S Plus.

7. Price 

The new phone is available for purchasing on September 16th. For the first time there is no longer a 16GB storage option, instead, the iPhone 7 will come in three storage models: 32GB ($649), 128GB ($749) and 256GB ($849). The iPhone 7 Plus also comes in the same storage models: 32GB ($769), 128GB ($869) and 256GB ($969).The new prices for the iPhone 6s are 32GB for $549 and 128GB for $649. The iPhone 6s Plus is 32GB for $649 and 128GB for $749.
  • iPhone 7 – 32GB ($649), 128GB ($749), 256GB ($849)
  • iPhone 6S – 32GB ($549), 128GB ($649)

8. Conclusion

The iPhone 7 isn't the biggest update in Apple history. Therefore, if you already have an iPhone 6s/6s Plus and aren't much of a gamer or photographer, then it may be best to hold onto your old device. However, if you're not troubled by the removal of the audio jack, have a habit of dropping your phone into bodies of water, and want to take advantage of the new performance, battery, and camera improvements, iPhone 7 and 7 Plus will be worthy of upgrading.

Wednesday, September 7, 2016

Transfer Data from Old iPhone/Android Phone to iPhone 7

Apple rolled out the newest iPhone 7/7 Plus today, which have many new features and designs, like a refreshed water-resistant design without a headphone jack, a force-sensitive home button, and a new glossy finish. The larger iPhone 7 Plus model also features two separate camera lenses. As "the most powerful chip ever in a smartphone", iPhone 7/7 Plus attract a lot of people around the world to switch from old iPhone/Android phone to the new iPhone. However, do you know how to transfer your data from your old mobile device to the new iDevice? Here I find some ways to help you.

1. How to Transfer Data from Old iPhone to New iPhone 7

1. Run iTunes and choose “Edit > Preference > Device > Prevent iPods, iPhones and iPads from syncing automatically” at the upper left corner of the window.
2. Plug the old iPhone into computer via the USB cable, and iTunes will recognize your iPhone. Right-click the name of your iPhone and choose “Back Up Now” in the drop-down menu.
3. iTunes will create a backup of your iPhone, and you may have to wait for a while until iTunes finishes backing up your iPhone.
4. Disconnect the old iPhone and plug in the new iPhone. After iTunes recognized the new iPhone, and at the “Set Up iPhone” screen, select “Restore from iTunes Backup”.
5. Select the most recent backup you just made from the restore menu in iTunes, then click “Continue”. When the restoring process is done, the new iPhone will restart.


1. Pick up your old iPhone. Make sure your iPhone or iPad is connected to Wi-Fi. (If you’re low on power, plug in as well.)
2. Launch Settings from the Home screen. Tap on iCloud > Backup. Then tap on Back Up Now.
3. Boot your new iPhone, and walk through the easy setup, then choose “Restore from iCloud Backup” when you’re at the Setup Assistant place. Then log in your iCloud account and choose the backup of your old iPhone, click “Restore” to get it to your iPhone 7. Wait till the iPhone has finished restoring from a backup. When the restore process is complete, your iPhone will restart. Then it will be ready for use. You should also connect the device to iTunes to sync data not contained in the backup (such as music, videos, apps, and so on).

With iTunes and iCloud, you can easily transfer data from old iPhone to new iPhone 7, and what about these non-purchased files? You may need the help of the third-party iPhone transfer software.

2. How to Transfer Data from Android to iPhone 7

Apple released a Move to iOS app for Android users to help transfer contacts, messages histories, camera photos and videos, web bookmarks, mail accounts, calendars, free apps from Android devices to iPhone. 
1. Download Move to iOS from any Android app store. The app is supported on all phones and tablets running Android 4.0 and later.
2. When you choose to migrate your data, your new iPhone will create a private Wi‑Fi network and find your nearby Android device running Move to iOS. After you enter a security code, it will begin transferring your content and put it in the right places. Just like that.
3. Once your content has been transferred, you’re ready to get going. iOS will set up your default mail account. And soon, it will add any free and paid apps you already own to your iTunes Wish List.* That’s it — you can start using your new iPhone and experiencing its endless possibilities. Enjoy.

Thursday, September 1, 2016

How to Fix iPhone Overheating Issue


Is your iPhone 6, iPhone 6s or iPhone SE overheating during charging or playing games? And you are wondering about "why my iPhone is overheating?" There are some tips to fix iPhone Overheating issues for you.

1. Disable Background App Refresh

You may not know that the apps running in the background are messing up your iPhone. It can not only impact the battery life of your device, but can also cause it to overheat. In order to solve this problem, you can go to Settings, General, and tap on Background App Refresh. The easiest solution is to disable the option for all the apps, and in order to do so, just press the switch. You can disable this options for some apps only.

2. Disable Sync for Safari

This solution solved the iPhone overheating issue for many iOS device users. To disable Sync for Safari, head over to Settings, open iCloud, and deactivate sync for Safari. After some seconds, you’ll see the change, and the iPhone overheating problem will be solved.

3. Restart Your iPhone

Restarting your iPhone can make your overheating iPhone calm down. Press and hold the Sleep/Wake button until the red slider appears. Then drag the slider to turn your device completely off. After the device turns off, press and hold the Sleep/Wake button again until you see the Apple logo.

4. Update iOS

It is essential to download the latest version of iOS when it becomes available, because it brings bug fixes and improvements in various fields, thus, it will improve the perfomance of your device.Once the iPhone has backed up, go to Settings and tap on “General”, followed by “Software Update”. When you see an update available, choose “Install Now”. When the update complete installation of itself, the device will automatically reboot and boot back up as normal when finished.

5. Erase All Content And Settings

This is effective, but should be taken as a last resort. You should back up the files on your device to iCloud or PC backup. Because this method will erase all your content and settings on your iPhone. 
You just need to go to “Settings > General > Reset” and then choose “Reset All Contents and Settings”, then you will get all the files in your iPhone erased.
With the five methods above, you are able to solve the issue if your iPhone is overheating. There  is another tip that you'd better not using your iPhone when it's charging. Some people have habit of using their iPhone while it is being charged. This is not good practice and not recommend in any case. When the iPhone is getting charged, there is current passing through the battery due to which is already in heat.

Wednesday, August 24, 2016

iPhone won't Charge? Here's How to Fix

"My iPhone 4 has stopped charging. I have tried four different cables, none work. One was brand new, but it will charge on an old Dick Smith brand iPod dock in the office at work. I can’t connect to my PC with it either. Any ideas?"
It's a quite frustrating thing that your iPhone isn't charging when your plug it in. Have you ever got iPhone not charging error before? Do you know what reason that caused the iPhone won't charge issue? And what to do when iPhone won't charge? Here's answer that you need.

1. Check for the iPhone Charging Port

One of the primary reasons that an iPhone won’t charge is remarkably simple; the port on the iPhone is clogged with dust, debris, pocket lint, or some other obstruction. Therefore, if you find any obstructions, get it out of there, preferably with something like a Q-Tip, toothpick, or a dry toothbrush. Then firmly plug your charging cable into your device. If the charging port is damaged, your device probably needs service.

2. Change the Wall Outlet or USB Port

The second common reason an iPhone won’t charge is because of where it’s actually plugged into. Sometimes the wall outlet itself isn’t working or the light switch is turned off. Therefore, if you’re using a wall charger, you can then change the outlet.
If you’re charging the iPhone from a USB cable connected to a computer, sometimes the USB port on the computer itself isn't working. Try another USB port on the computer, PC or Mac doesn’t matter, that often fixes the issue too.

3. Check the USB Cable for Damage

Damage to the USB charging cable will prevent an iPhone from charging. This can be somewhat obvious in some situations, and if the cable is fraying or torn, well, there’s your problem. If your cable is damaged, you need a new USB cable to charge the iPhone, it’s that simple. You can go to Amazon or other online store to get a cheaper iPhone USB cable alternative, which works well, too.

4. Force Reboot Your iPhone

Rarely needed, but sometimes a simple reboot can resolve a software issue that basically refuses to acknowledge the device is charging. This is somewhat rare, but it can happen. Force restart your device: Press and hold the Sleep/Wake and Home buttons at the same time for at least 10 seconds, until you see the Apple logo. Then let your device charge for another half hour.


If your device still won’t power on or charge, take your device, charging cable, and charging adapter to an Apple Retail Store or Apple Authorized Service Provider for evaluation. You can also contact Apple Support.


Monday, August 15, 2016

How to Factory Reset iPhone with/without iTunes

If your iPhone is frozen or you just want a brand new iPhone, you can reset your iPhone to satisfy your needs. But please note that factory reset process will remove all data and settings on the device, meaning you will lose everything that is stored on your iPhone, like pictures, music,  notes,  specific app data, etc. If you are looking to avoid that data loss, you need to backup the iPhone with iTunes or back up iPhone to iCloud beforehand, that way you can restore personal data after the reset if you want to.
Now, the post will show you  how to factory reset iPhone with or without iTunes. 

1. Factory Reset iPhone with iTunes

Before you start restoring iPhone to factory settings, please note that you need to install the latest version of iTunes on your PC or MAC. Then go to Settings > iCloud to turn off Find My iPhone. Now, the detailed restoring steps are as follows.
Step 1. Plug iPhone into the computer with the USB cable. The iTunes on your computer will automatically launch. If not, double-click the icon to start it.

Step 2. Click the name of your iPhone at the upper right corner of iTunes, and then the information of your iPhone will be shown. Click the “Restore iPhone” button in the window to start.

Step 3. iTunes will ask whether you want to back up iPhone before restoring. You’d better choose “Yes” for the reset will erase the contents in your iPhone. Then iTunes will start restoring your iPhone to factory settings.
Step 4. Click Restore again to confirm. Then iTunes erases your iPhone and installs the latest iOS or iPod software. After you restore iPhone to factory settings, it will restart. Now you can set it up as new.


2. Factory Reset iPhone without iTunes

If you have no computer at hand, you are able to reset your iPhone to factory setting without iTunes. The following steps will show you how to do that.
Step 1. Open the Settings app and tap "General." Then scroll to the bottom and tap "Reset."
Step 2. Tap "Erase All Content and Settings."
Step 3. You will need to enter your restrictions password and your screen lock password in order to proceed with the reset.

The reset process usually takes about 20 minutes or so to complete. Your iPhone may reboot during the reset process. Therefore wait for the reset patiently!
The above two methods are about how to reset iPhone with/without iTunes. Operating processes are both not complicated. If you have the relative need, try it by yourself! 

Thursday, August 11, 2016

Your iPhone Battery Drains Too Fast, How to Fix?

After updating to the latest iOS version, many iPhone users may find that their iPhone battery is draining more faster than before. It's a frustration that you need to charge your iOS devices every single hour because your iPhone battery drains fast. iOS does report the percentage of power use in the top right corner of your iPhone screen. Imaging that when you are playing games, watching videos, chatting with friends or listening music, your iPhone suddenly reminds you that you have to charge your iPhone. Do you like that? I think that your answer must be "NO! I hate it!"

Now, here i will provide several solutions that you can take advantage of to fix iPhone battery draining fast issues. Try out these iPhone battery tips to bring your battery life back up to where you can get several days of standby, or at least get through a whole day without recharging. Let's see how to do that.

1.  Turn on Low Power Mode

If you have installed  iOS 9 or later on your iPhone, then you can take advantage of Apple’s Low Power Mode to save battery life on iPhone. You’ll find the toggle to turn it on in Settings > Battery > Low Power Mode. After turning on Low Power mode, it will temporarily turn off or reduces mail fetch, Siri functions, background app refresh, automatic downloads, and some visual effects until you fully charge your iPhone.

2. Disable Location Services

Disabling the Location Services on your iPhone results in far less WiFi and GPS activity, which in turn reduces overall power consumption by quite a margin. Go to “Settings” and tap on “Privacy”, then “Location Services” and disable the toggle at the top to turn off the Location Services. Alternatively, you can adapt the list of apps which are allowed to use your location if you prefer to keep it on, but still want the benefit of reducing the location queries that make your battery drain faster.


3. Disable Wi-Fi/Bluetooth

When you are walking on the road or doing other things with no need to use Wi-Fi and Bluetooth, you can turn off Wi-Fi or Bluetooth to save iPhone battery life. 
You can simply swipe upwards from the bottom of your screen to access the Control Center and tap the Bluetooth icon in the center. While Bluetooth is turned off, the icon will appear more dimly in color. You can also swipe up from the bottom of your screen and tap the little wireless icon in your Control Center to switch it off.


4. Turn off iCloud

Automatically backing up iPhone data to iCloud will drain your battery and eat through your data allowance. It’s a useful feature for backing up precious photos, but there might be a few things being backed up that you don’t really care about or need. Therefore, you can close the function of automatically backing up with iCloud. Take a look in Settings > iCloud and toggle off anything you don’t want. When you want to backup to iCloud again, you can turn on iCloud app.

5. Disable Background App Refresh

Go to Settings > General > Background App Refresh and take a look at the list, you will find that many apps on your iPhone are updating automatically.  Do you really need all those apps updating themselves in the background and draining your iPhone battery life? You can turn off all the apps you don’t need to update automatically. Remember, they’ll still update and work as normal when you fire them up, they just won’t keep running when you’re not using them.

6. Adjust iPhone Screen Brightness

The too bright screen drains iPhone battery faster than anything else, The brighter it is, the faster it drains. Therefore, the easiest way to solove the issue of iPhone battery draining fast is to reduce your iPhone screen brightness. Go to Settings > Wallpaper & Brightness and turn Auto-Brightness off. Then, set your brightness to the lowest setting that still looks readable. You might have to tweak it from time to time, but you’ll save a lot of juice this way. You can simply swipe upwards from the bottom of your screen to access the Control Center and adjust iPhone screen brightness with ease.

7. Close Push Notifications from Apps

Some apps will send you notifications every day that you don’t really need. Go to Settings > Notification Center and look under Include. Tap on any apps that you don’t need notifications from and choose None under the Alert Style, and then toggle Show in Navigation Center to off and Show on Lock Screen to off.


Wednesday, August 3, 2016

Forget Your iPhone Password? Here's How to Fix

Password is an effective and essential way for iPhone users to protect personal privacy. But if we don't use our iPhone for a long time, we may forget the password. It is the quite frustrating thing for us to forget all kinds of passwords, which means that we need to waste a lot of time to find them back or reset a new password. Especially, forgetting iPhone password will affect our daily life and works. Therefore, it is important for you to know how to reset iPhone password in quick ways. Here we introduce three ways to help you reset your iPhone password.

1. Using iTunes

Step 1. Connect your iPhone to the computer that your iPhone has trusted with a USB cable.
Step 2. Launch iTunes. If you’ve synced your iPhone with iTunes, then no “enter password” is required.
Step 3. iTunes will automatically sync your iPhone and create a backup file. If it doesn’t, you should sync your iTunes and create a backup file manually by in the Summary window.
Step 4. In the Summary window, you can see the option “Restore iPhone”. Click it and follow prompts to choose the latest iTunes backup to restore your iPhone.
Step 5. After the restoration process is complete, your passcode will be erased and all your data will be restored from your backup. You will now be able to access your iPhone without any passcode. And you can set your new password on iPhone.

Note: If you have synced your iPhone with iTunes before you forgot your iPhone password, you can reset your iPhone by using iTunes. Otherwise, you have to reset iPhone password with Recovery Mode mentioned below.

2.  Using iCloud Find My iPhone

Step 1. Go to icloud.com and log in with your Apple ID and password on your computer.
Step 2. Click Find My iPhone. Then click All Devices at the top of your browser window.
Step 3. Select your iPhone from all the devices listed. Click Erase iPhone to erase your iPhone along with its passcode.
Step 4. Use the Setup Assistant on your device to restore the most recent backup of your device.
Step 5. After the restoration process is finished, your passcode will be erased and all your data will be restored from your iCloud backup. You will now be able to access your iPhone without any passcode.

Note: Before you use the method, you should ensure that Find My iPhone app is ON.

3. Using Recovery Mode

If the above two methods don't work well, you can try resetting iPhone password by using Recovery Mode.
Step 1. Disconnect all cables from your iPhone and turn it off.
Step 2. Press and hold the Home button and connect your device to iTunes. If your iPhone does not turn on, please turn it on manually.
Step 3. Continue holding the Home button until you see the Connect to iTunes screen. iTunes will remind you that it has detected your iPhone in recovery mode.
Step 4. Click OK. The Summary tab in iTunes appears. Click “Restore iPhone” and restore your iPhone.

Note: Recovery Mode will erase all your data and passcode from your iPhone, resetting it to factory defaults. Thus, you’ll have a brand new iPhone without any personal data after you reset iPhone password with Recovery Mode. 

4. How to Create A New Password?

If you remember your current iPhone password and you just want to change  a new password, you can finish it with ease. 
Step 1. Go to Setting > Touch ID & Passcode (iOS 9/8/7) or Passcode Lock (iOS 6),


Step 2. Enter the current password and tap Change Passcode. Then enter the new passcode.

Conclusion:

Resetting iPhone password is actually not complicated if you follow the steps mentioned above. If you have synced your iPhone with iTunes before or if you have enabled your Find My iPhone on, you'd better try the first two methods. Since Recovery Mode will erase all your data from iPhone after resetting, please consider carefully whether you need to use this method to reset password on iPhone.


Tuesday, July 26, 2016

What You Can Do If Your iPhone Won't Turn On

It will be quite frustrating if your iPhone won't turn on by some reasons, which may bring some inconvenience for your daily life. There are many reasons that can lead to the problem, like battery running out, iOS crash or hardware error. You have no need to ditch your iPhone or send it to Apple Repair shop directly when you find that your iPhone won't turn on. Here are four solutions that you can try to fix the issue by yourself.

1. Charge Your iPhone for  A While and Wait

Sometimes your iPhone is out of battery, so your iPhone can't turn on. What you need to do is to plug in your iPhone and let it charge for a while, at least fifteen minutes. A few minutes later, it should turn on automatically. If it won’t work after charging, try to change another USB cable and charger to try this way.

 2. Forcibly Reboot Your iPhone

If your iPhone is crashed or frozen, the force reboot solution works well, but it can sometimes cause an unresponsive iPhone with a black screen that appears dead because it isn’t responsive to anything.
How to do: Press and hold both the "Home” and “Power” button for at least 10 seconds. You can see the Apple logo and your iPhone will reboot. Your iPhone will back to normal again.

3.   Enter DFU Mode

If your iPhone gets to the Silver Logo but restarts from there again and again, you can fix this easily by entering into DFU mode
Step 1. Plug your device into your computer with a USB cable.
Step 2. Turn off the device.
Step 3. Hold the Power button for 3 seconds.
Step 4. Hold the Home and Power buttons for 10 seconds.
Step 5. Release the Power button but keep holding the Home button.
Step 6. After about 15 seconds you will be alerted by iTunes saying that it has detected a device in Recovery Mode.


4. Restore iPhone to Factory Setting with iTunes

If your iPhone still won't turn on after you try to the three methods above. You may need to restore your iPhone to factory setting with iTunes. Before you start restoring iPhone to factory settings, please note that you need to install the latest version of iTunes on your PC or MAC. Then go to Settings > iCloud to turn off Find My iPhone. Now, the detailed restoring steps are as follows.
Step 1. Plug iPhone into the computer with the USB cable. The iTunes on your computer will automatically launch. If not, double-click the icon to start it.
Step 2. Click the name of your iPhone at the upper right corner of iTunes, and then the information of your iPhone will be shown. Click the “Restore iPhone” button in the window to start.
Step 3. iTunes will ask whether you want to back up iPhone before restoring. You’d better choose “Yes” for the reset will erase the contents in your iPhone. Then iTunes will start restoring your iPhone to factory settings.

Step 4. Click Restore again to confirm. Then iTunes erases your iPhone and installs the latest iOS or iPod software. After you restore your iPhone to factory settings, it will restart. Now you can set it up as new.

If you have tried all the methods mentioned above and your iPhone won't turn on, you need to bring your iPhone to the nearest Apple store and ask for help.