If you recently upgraded your computer to Windows 10, you might meet the “iTunes not recognizing iPhone in Windows 10″ issue . No worries. In this post we are going to tell you how to fix iTunes not recognizing iPhone in Windows 10 computers.
Now, the following solution may help you fix the iTunes issue if you found that your iTunes does not recognize iPhone in Windows 10 computer.
Step 1. Connect your iPhone to computer and wait for some time until the device is recognized.
Step 2. Right-click “Computer”, Go to “Device Manager”. Then expand category “Universal Serial Bus controllers” and locate “Apple Mobile Device USB Driver”.

Step 3. Right-click “Apple Mobile Device USB Driver” and click “Update Driver Software”. On the pop-out window, choose “Browse my computer for driver software”.

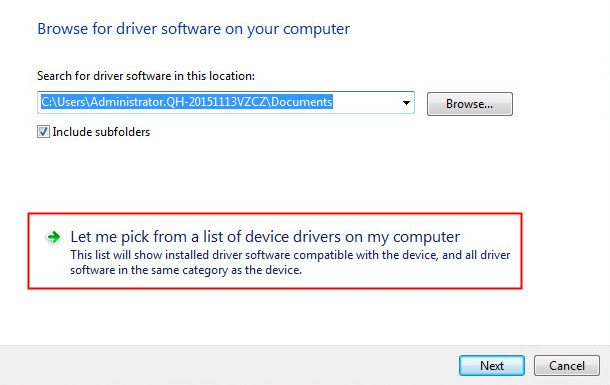
Step 4. Then choose “Let me pick from a list of device drivers on my computer”.
Step 5. Click “Have Disk…” button.

Step 6. Click “Browse”.

Step 7. Navigate to “C:\Program Files\Common Files\Apple\Mobile Device Support\Drivers”. Then double-click the usbaapl file. If you have a 64-bit version of Windows, this file will be called usbaapl64.

If you don’t see usbaapl64 here or if there isn’t a Drivers folder, look in “C:\Program Files (x86)\Common Files\Apple\Mobile Device Support\Drivers”.
Then you need to install the driver for your Windows 10. After installing, unplug your iPhone, then reconnect it using USB cable. Open your iTunes and see if your iPhone can be detected or recognized by iTunes.
Note:
- Make sure that you have the button Trust this computer on your iPhone when connecting to your PC.
- Make sure that you have installed all Windows updates. This is to make sure that your computer device drivers are up to date.
- Make sure your iPhone USB cable works well.
- Make sure your iOS device is turned on.
- Make sure you have the latest version of iTunes installed.
No comments:
Post a Comment